📦 Deployments
- ⛴️ Docker Deployment
- ⬛ ZimaOS Deployment
- 🟦 TrueNas
- ☂️ Umbrel Deployment
- 🇾 YunoHost Deployment
- 02. Docker Compose File
- 02. First time Login
- 03. Setup your Administrator account
- 04. Video Upload Size
- 05. Peertube HCaptcha
- 06. Channels
- 07. Playlists
⛴️ Docker Deployment
To run a PeerTube instance you don't need that many resources, however if you want to host lots of videos then obviously you need lots of storage. We recommend to install PeerTube as a dedicated Docker VM if you are planning to host is for multiple people, just to keep things simple and isolated. If you are only hosting it for yourself and family then you can simply run it in your existing Docker VM
Storage
CPU
4 CPU
1. Create a new docker VM by using the Docker VM Proxmox Helper Script. If you don't know how to do this check it out at our HomeLab Instance.
2. Enter the VM through SSH
3. Then as for any new VM that is created you should update the machine by using
sudo apt update && sudo apt upgrade -y
4. Then after that we will again add your username to the sudo and docker group with
usermod -aG sudo <username>
usermod -aG docker <username>
5. Then log out of your SSH session and log back in for the changes to take effect
6. Now, that is all set and done we also recommend to create a new Arcane Dashboard for managing the resources and updates of your PeerTube instance. If you don't know how to do this check out our Arcane inside our HomeLab instance
7. Arcane stores its projects by default inside /opt/docker/projects. Therefore we create the folder projects and inside of it the PeerTub project folder Peertube.
8.
9. Ownership Docker compose file: Now, you can just run Peertube with root and you don't need to change any of the ownership in the configuration file. Howerver, for safety reasons it is recommended to run it as your user and not as root. On top of that if you are using an NFS mount for all the video storage it is recommended to use the same Group ID and User ID for everything. To do this you can just add
user: "1000:1000" or any other group and user ID you have assigned to it.
10. Then if you make all the different folders inside the Peertube directory folder owned by your user and group you simply hit the command
sudo chown username:groupname -R *
11. Then if your username is dpasn and groupname is dpasn it should look like this ;)
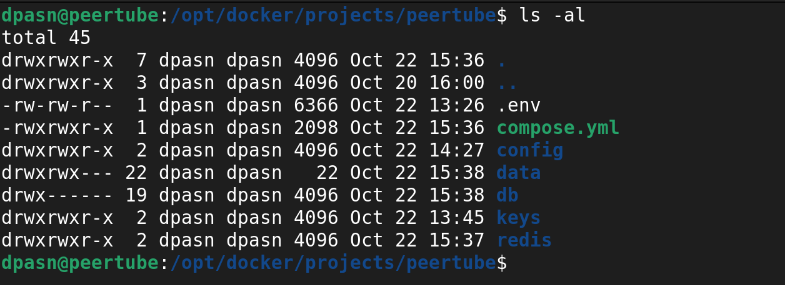
12. Finally, we also want to give the right permisions to all the folders. That only your user and group can interact with the folders and files. As usual we will do that with
sudo chmod 775 -R *
Docker Compose File
.ENV File
⬛ ZimaOS Deployment
🟦 TrueNas
☂️ Umbrel Deployment
🇾 YunoHost Deployment
02. Docker Compose File
Docker compose File
compose.yml
services:
  peertube:
    users: "1000:1000"
    # If you don't want to use the official image and build one from sources:
    # build:
    #   context: .
    #   dockerfile: ./support/docker/production/Dockerfile
    image: chocobozzz/peertube:production
    # Use a static IP for this container because nginx does not handle proxy host change without reload
    # This container could be restarted on crash or until the postgresql database is ready for connection
    networks:
      default:
        ipv4_address: 172.34.0.42
        ipv6_address: fdab:e4b3:21a2:ef1b::42
    env_file:
      - .env

    ports:
     - "1935:1935" # Comment if you don't want to use the live feature
     - "1001:9000" # Uncomment if you use another webserver/proxy or test PeerTube in local, otherwise not suitable for production
    volumes:
      # Remove the following line if you want to use another webserver/proxy or test PeerTube in local
      - assets:/app/client/dist
      - ./docker-volume/data:/data
      - ./docker-volume/config:/config
    depends_on:
      - postgres
      - redis
      - postfix
    restart: "always"

  postgres:
    users: "1000:1000"
    # Bumping the major version on an existing data directory requires a proper PostgreSQL upgrade
    # See https://docs.joinpeertube.org/install/docker#upgrade-postgresql-container
    image: postgres:17-alpine
    env_file:
      - .env
    volumes:
      # With PostgreSQL >= 18, witch the mount target to /var/lib/postgresql instead
      # (data dir is nested under a subfolder, for example /var/lib/postgresql/18/docker)
      # See https://hub.docker.com/_/postgres for more information
      - ./docker-volume/db:/var/lib/postgresql/data
    restart: "always"

  redis:
    users: "1000:1000"
    image: redis:8-alpine
    volumes:
      - ./docker-volume/redis:/data
    restart: "always"

  postfix:
    users: "1000:1000"
    image: mwader/postfix-relay
    env_file:
      - .env
    volumes:
      - ./docker-volume/opendkim/keys:/etc/opendkim/keys
    restart: "always"

networks:
  default:
    enable_ipv6: true
    ipam:
      driver: default
      config:
      - subnet: 172.34.0.0/16
      - subnet: fdab:e4b3:21a2:ef1b::/64

volumes:
  assets:
.env File
.env
# Maximum Video Upload Size Expressed in MiB

PEERTUBE_VIDEO_FILES_MAX_SIZE=1000MiB

# Database / Postgres service configuration
POSTGRES_USER=peertube
POSTGRES_PASSWORD=df9j938fje89iojksfskdf93jksdkfj9oijr98ijwfj9io
# Postgres database name "peertube"
POSTGRES_DB=peertube
# The database name used by PeerTube will be PEERTUBE_DB_NAME (only if set) *OR* 'peertube'+PEERTUBE_DB_SUFFIX
PEERTUBE_DB_NAME=peertube
PEERTUBE_DB_SUFFIX=_prod
# Database username and password used by PeerTube must match Postgres', so they are copied:
PEERTUBE_DB_USERNAME=$POSTGRES_USER
PEERTUBE_DB_PASSWORD=$POSTGRES_PASSWORD
PEERTUBE_DB_SSL=false
# Default to Postgres service name "postgres" in docker-compose.yml
PEERTUBE_DB_HOSTNAME=postgres

# PeerTube server configuration
# If you test PeerTube in local: use "peertube.localhost" and add this domain to your host file resolving on 127.0.0.1
PEERTUBE_WEBSERVER_HOSTNAME=exampletube.org
# If you just want to test PeerTube on local
#PEERTUBE_WEBSERVER_PORT=9000
#PEERTUBE_WEBSERVER_HTTPS=true
# If you need more than one IP as trust_proxy
# pass them as a comma separated array:
PEERTUBE_TRUST_PROXY=["62.45.155.45", "172.18.0.0/24", "10.69.4.105"]

# Generate one using `openssl rand -hex 32`
PEERTUBE_SECRET=8daef45034d9a099fc4f4487f010aaf5c5231da15f1ab3sdfjiowefjosifjoie

# E-mail configuration
# If you use a Custom SMTP server
PEERTUBE_SMTP_USERNAME=noreply@deternet.org
PEERTUBE_SMTP_PASSWORD=asdflsjdflksnlkjlk
# Default to Postfix service name "postfix" in docker-compose.yml
# May be the hostname of your Custom SMTP server
PEERTUBE_SMTP_HOSTNAME=smtp.porkbun.com
PEERTUBE_SMTP_PORT=587
PEERTUBE_SMTP_FROM=team@deternet.org
PEERTUBE_SMTP_TLS=false
PEERTUBE_SMTP_DISABLE_STARTTLS=true
PEERTUBE_ADMIN_EMAIL=team@deternet.org

# Postfix service configuration
#POSTFIX_myhostname=<MY DOMAIN>
# If you need to generate a list of sub/DOMAIN keys
# pass them as a whitespace separated string <DOMAIN>=<selector>
#OPENDKIM_DOMAINS=<MY DOMAIN>=peertube
# see https://github.com/wader/postfix-relay/pull/18
#OPENDKIM_RequireSafeKeys=no

# If you want to enable object storage for PeerTube, set the following variables.
#PEERTUBE_OBJECT_STORAGE_ENABLED=
#PEERTUBE_OBJECT_STORAGE_ENDPOINT=
#PEERTUBE_OBJECT_STORAGE_REGION=
#PEERTUBE_OBJECT_STORAGE_CREDENTIALS_ACCESS_KEY_ID=
#PEERTUBE_OBJECT_STORAGE_CREDENTIALS_SECRET_ACCESS_KEY=
#PEERTUBE_OBJECT_STORAGE_STREAMING_PLAYLISTS_BUCKET_NAME=
#PEERTUBE_OBJECT_STORAGE_STREAMING_PLAYLISTS_PREFIX=
#PEERTUBE_OBJECT_STORAGE_STREAMING_PLAYLISTS_BASE_URL=
#PEERTUBE_OBJECT_STORAGE_WEB_VIDEOS_BUCKET_NAME=
#PEERTUBE_OBJECT_STORAGE_WEB_VIDEOS_PREFIX=
#PEERTUBE_OBJECT_STORAGE_WEB_VIDEOS_BASE_URL=
#PEERTUBE_OBJECT_STORAGE_USER_EXPORTS_BUCKET_NAME=
#PEERTUBE_OBJECT_STORAGE_USER_EXPORTS_PREFIX=
#PEERTUBE_OBJECT_STORAGE_USER_EXPORTS_BASE_URL=
#PEERTUBE_OBJECT_STORAGE_ORIGINAL_VIDEO_FILES_BUCKET_NAME=
#PEERTUBE_OBJECT_STORAGE_ORIGINAL_VIDEO_FILES_PREFIX=
#PEERTUBE_OBJECT_STORAGE_ORIGINAL_VIDEO_FILES_BASE_URL=
#PEERTUBE_OBJECT_STORAGE_CAPTIONS_BUCKET_NAME=
#PEERTUBE_OBJECT_STORAGE_CAPTIONS_PREFIX=
#PEERTUBE_OBJECT_STORAGE_CAPTIONS_BASE_URL=

# Comment these variables if your S3 provider does not support object ACL
#PEERTUBE_OBJECT_STORAGE_UPLOAD_ACL_PUBLIC="public-read"
#PEERTUBE_OBJECT_STORAGE_UPLOAD_ACL_PRIVATE="private"

#PEERTUBE_LOG_LEVEL=info

# /!\ Prefer to use the PeerTube admin interface to set the following configurations /!\
#PEERTUBE_SIGNUP_ENABLED=true
#PEERTUBE_TRANSCODING_ENABLED=true
#PEERTUBE_CONTACT_FORM_ENABLED=true
The Environment file has a couple of things to think about and that you need to change.
1. Already on the top we defined the Maximum Video Upload size variable. By default the max upload size is 100MB and hence it is recommended to increase its size. For instance 1 GB which can be expressed by 1000MiB
PEERTUBE_VIDEO_FILES_MAX_SIZE=1000MiB
2. The second thing we need to organize is the Postgres database. As always we just need to create a user, database name and password
POSTGRES_USER=peertube
POSTGRES_PASSWORD=df9j938fje89iojksfskdf93jksdkfj9oijr98ijwfj9io
# Postgres database name "peertube"
POSTGRES_DB=peertube
3. The third thing that needs to be adjusted is the domain name that you want to use for your PeerTube instance. It is important that you are sure about it on beforehand since you cannot change it later, due to the fact that it will participate in the Fediverse.
PEERTUBE_WEBSERVER_HOSTNAME=exampletube.org
4. The next thing are the Email Credentials. By default it uses Postfix, and you can keep this container if you later want to use it. However, lots of people just have standard SMTP server with a domain registrar e.g Porkbun. If you want this then you need to fill in the following information
# E-mail configuration
# If you use a Custom SMTP server
PEERTUBE_SMTP_USERNAME=noreply[at]example.org
PEERTUBE_SMTP_PASSWORD=difficult_password
# Default to Postfix service name "postfix" in docker-compose.yml
# May be the hostname of your Custom SMTP server
PEERTUBE_SMTP_HOSTNAME=smtp.example.org
PEERTUBE_SMTP_PORT=587
PEERTUBE_SMTP_FROM=username@example.org
PEERTUBE_SMTP_TLS=false
PEERTUBE_SMTP_DISABLE_STARTTLS=true
PEERTUBE_ADMIN_EMAIL=admin@example.org
3.
02. First time Login
After you have spun up your Peertube instance then it is time to obtain your first time login credentials. Well to get these you need to check your logs, since they will be presented in there
1. Assuming you are still logged in with SSH to your PeerTube VM you move your ass to
cd /opt/docker/projects/peertube/data/logs2. Then you simply use nano to enter the logs with
nano peertube.log3. Then at the top of the logs it should provide you your root credentials. A screenshot of how this looks like is given below

4. Then before logging in we recommend to create a new Vaultwarden entry that stores the Root Password in case you need it.
5. Then simply copy the password and move to your PeerTube domain address
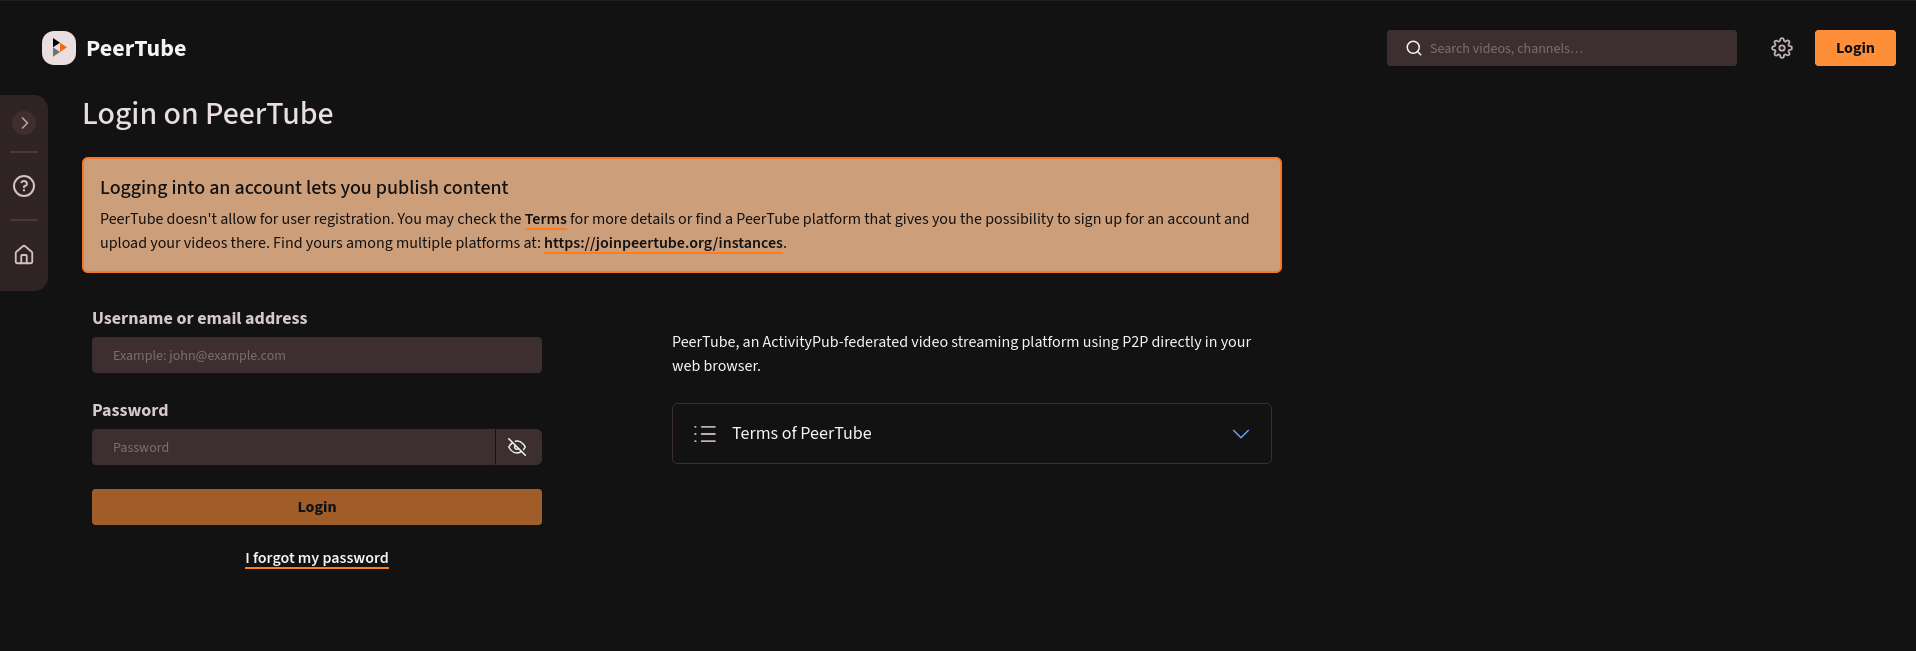
6. Fill in the credentials
7. Then the first thing we will do is create another administrator account. It is not recommended to post videos with a root account and such we will do nothing with the root account in the future. The only reason you might need it is for maintenance purposes. To create another administrator account go the Menu on the left > Overview > Create user
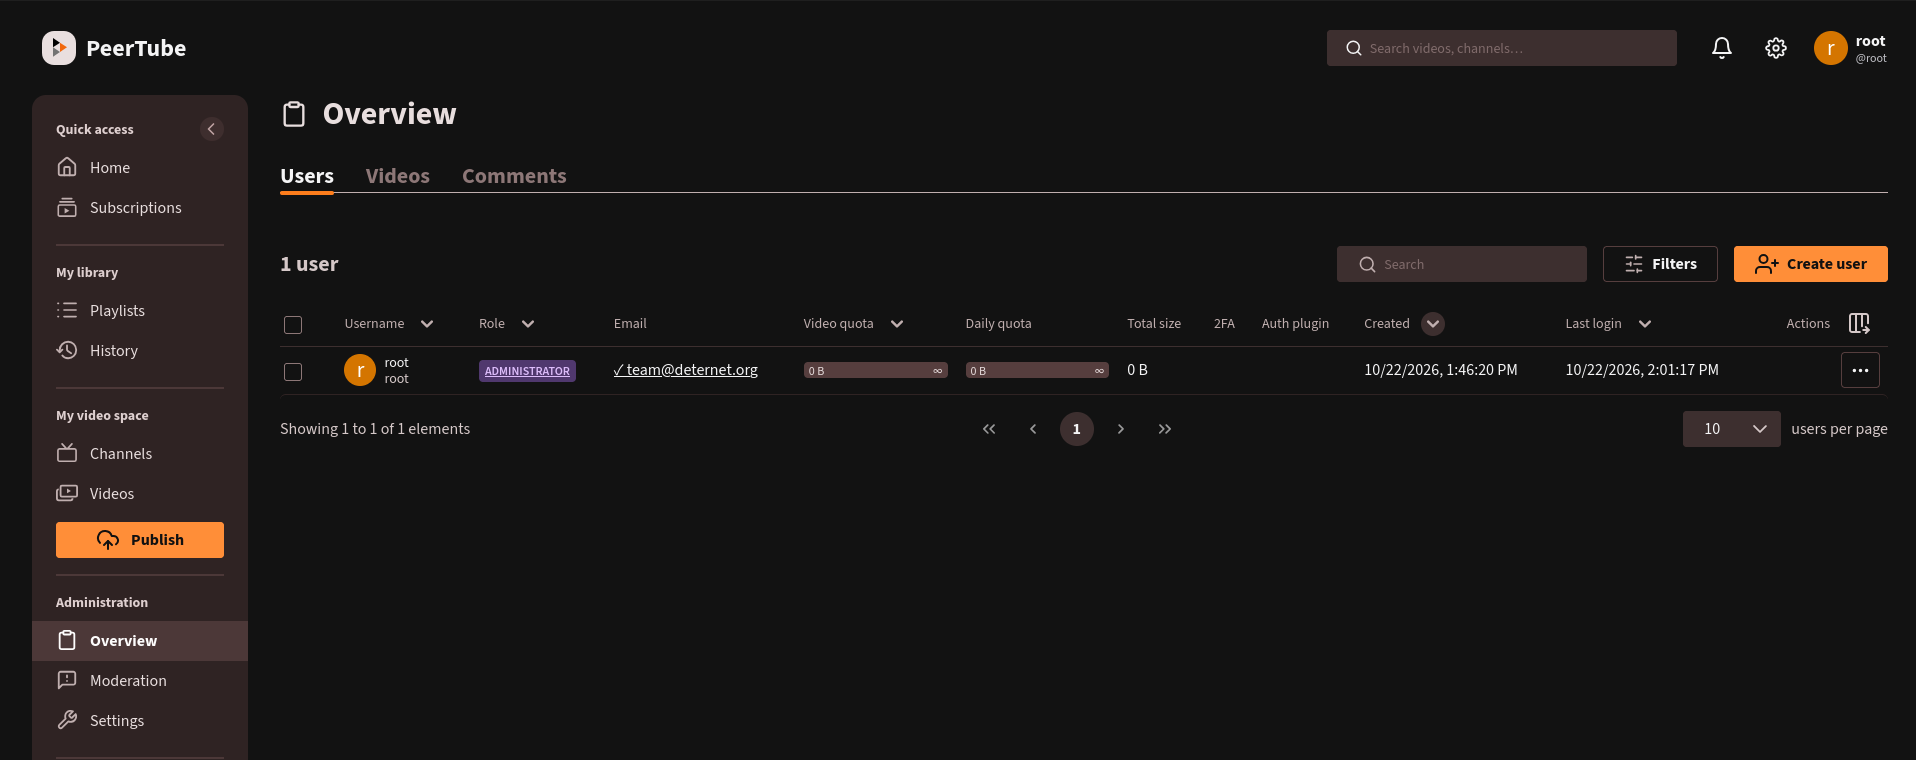
8. So click on Create new user and fill in the credentials! Make sure to select Role: Administrator and also check the box of User Bypasses video validation by moderators
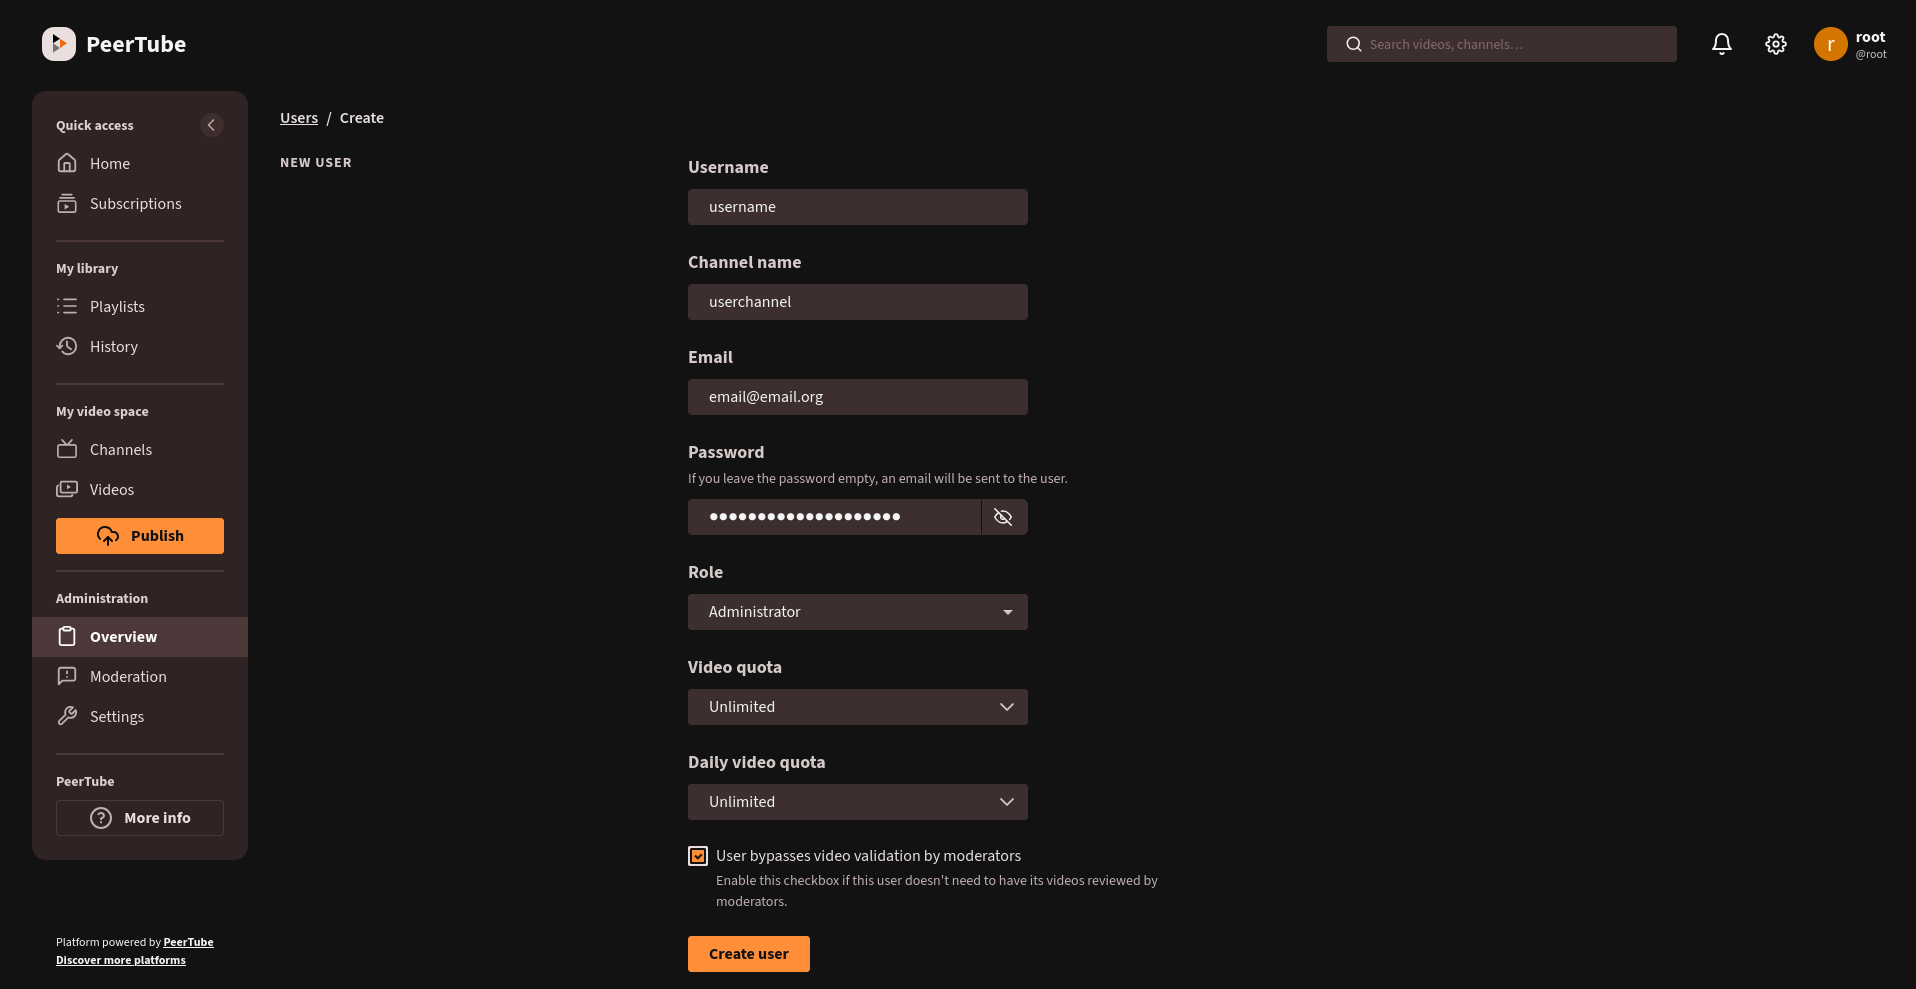
9. After the user has been created you should log out from the root account and login with your new administrator credentials
10. Sweet! You are logged in perfect!
03. Setup your Administrator account
Now that you have an administrator account it is time to finish up your user profile that is used for other people on the Fediverse to see.
1. Click on your
04. Video Upload Size
By default Peertube allows users to upload files of maximum 100MB. However, this can easily be changed by adding the following to your .env file
PEERTUBE_VIDEO_FILES_MAX_SIZE=10000MiB
You can then decide for yourself how big of a files you want people to upload. You can still set data caps throughout the GUI but not the maximum file size that I am aware off. Hence, I would recommend to upload maximum roughly 10GB expressed as 10000 MiB = (10.48576 GB).
After the change you need to restart again your Peertube instance with
docker compose up -d --force-recreate --remove-orphans 05. Peertube HCaptcha
For as long as bots cannot get around HCaptcha it will be worth it to install a Captcha for users that want to create an account on your instance. Two things need to happen to make this possible
- First of all you need to make a HCaptcha account on their official wesit
2. The second part is going into your Peertube administration dashboard
3. Go to Settings >